Step-By-Step Illustration Guide with our Chief Creative Cat
Hello and welcome to our first illustration lesson with Ruki, the Chief Creative Cat at Banjo HQ. Ruki has made a step-by-step illustration guide on how to draw our favourite cat pal Banjo Robinson! She’s also recorded a short video talking about her job at Banjo HQ and what has inspired her love of illustration! Ruki finishes the clip with some adorable words of wisdom for any aspiring creative Banjitos.
How to Draw Banjo: Step-by-Step Illustration Guide
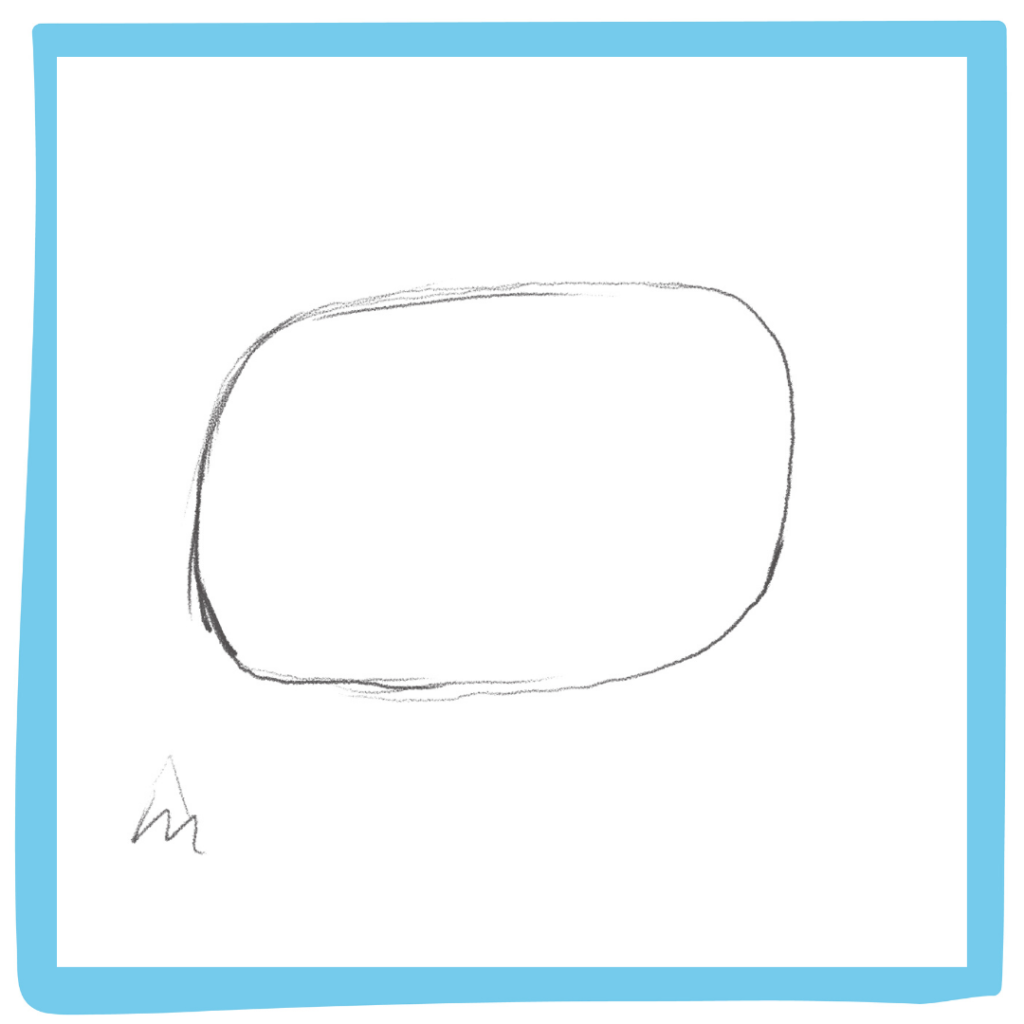
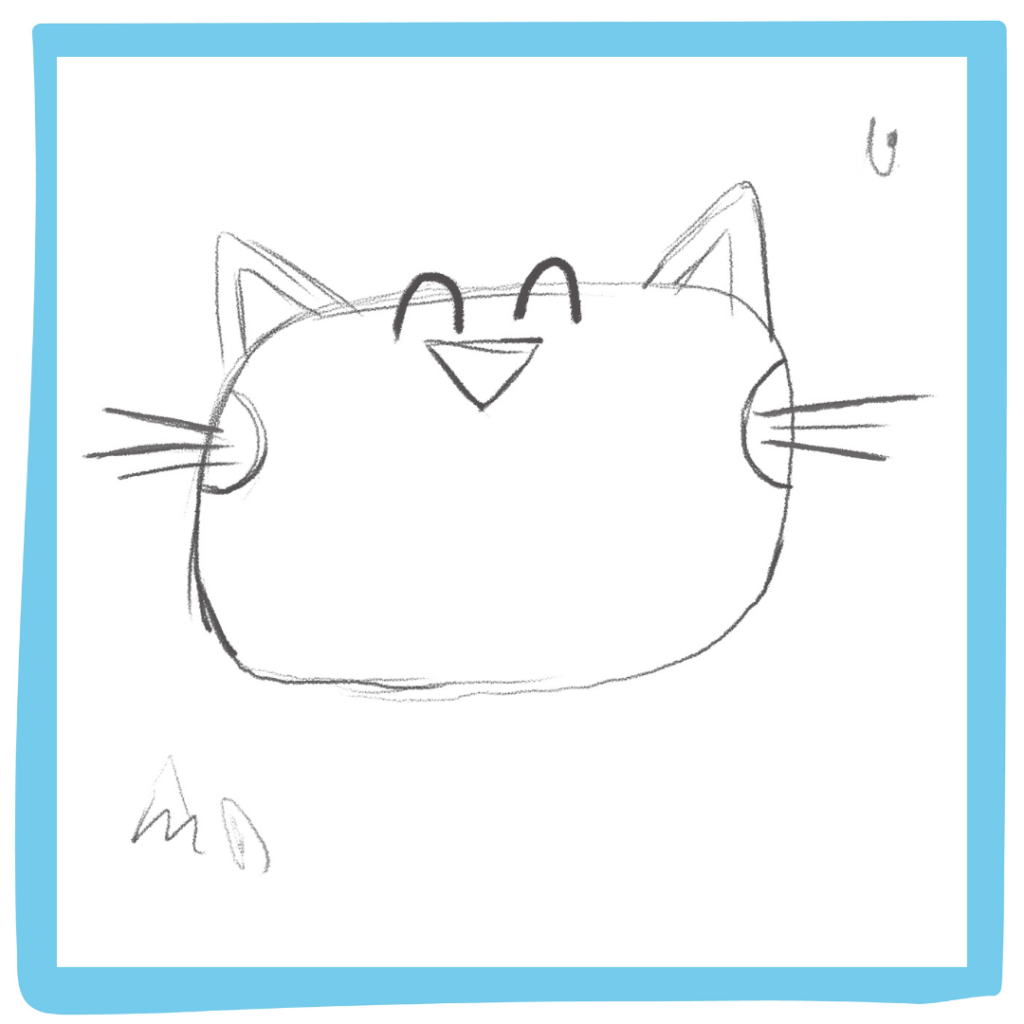
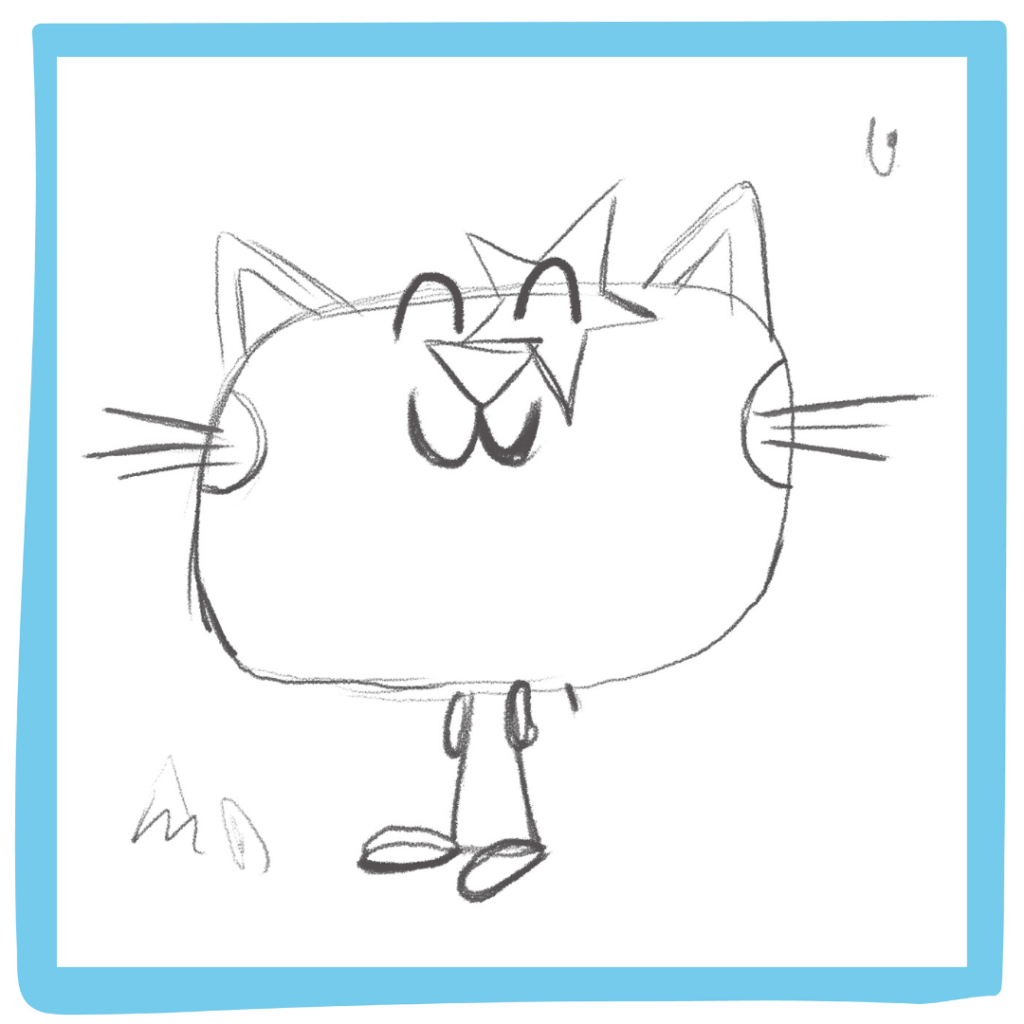
Step 1
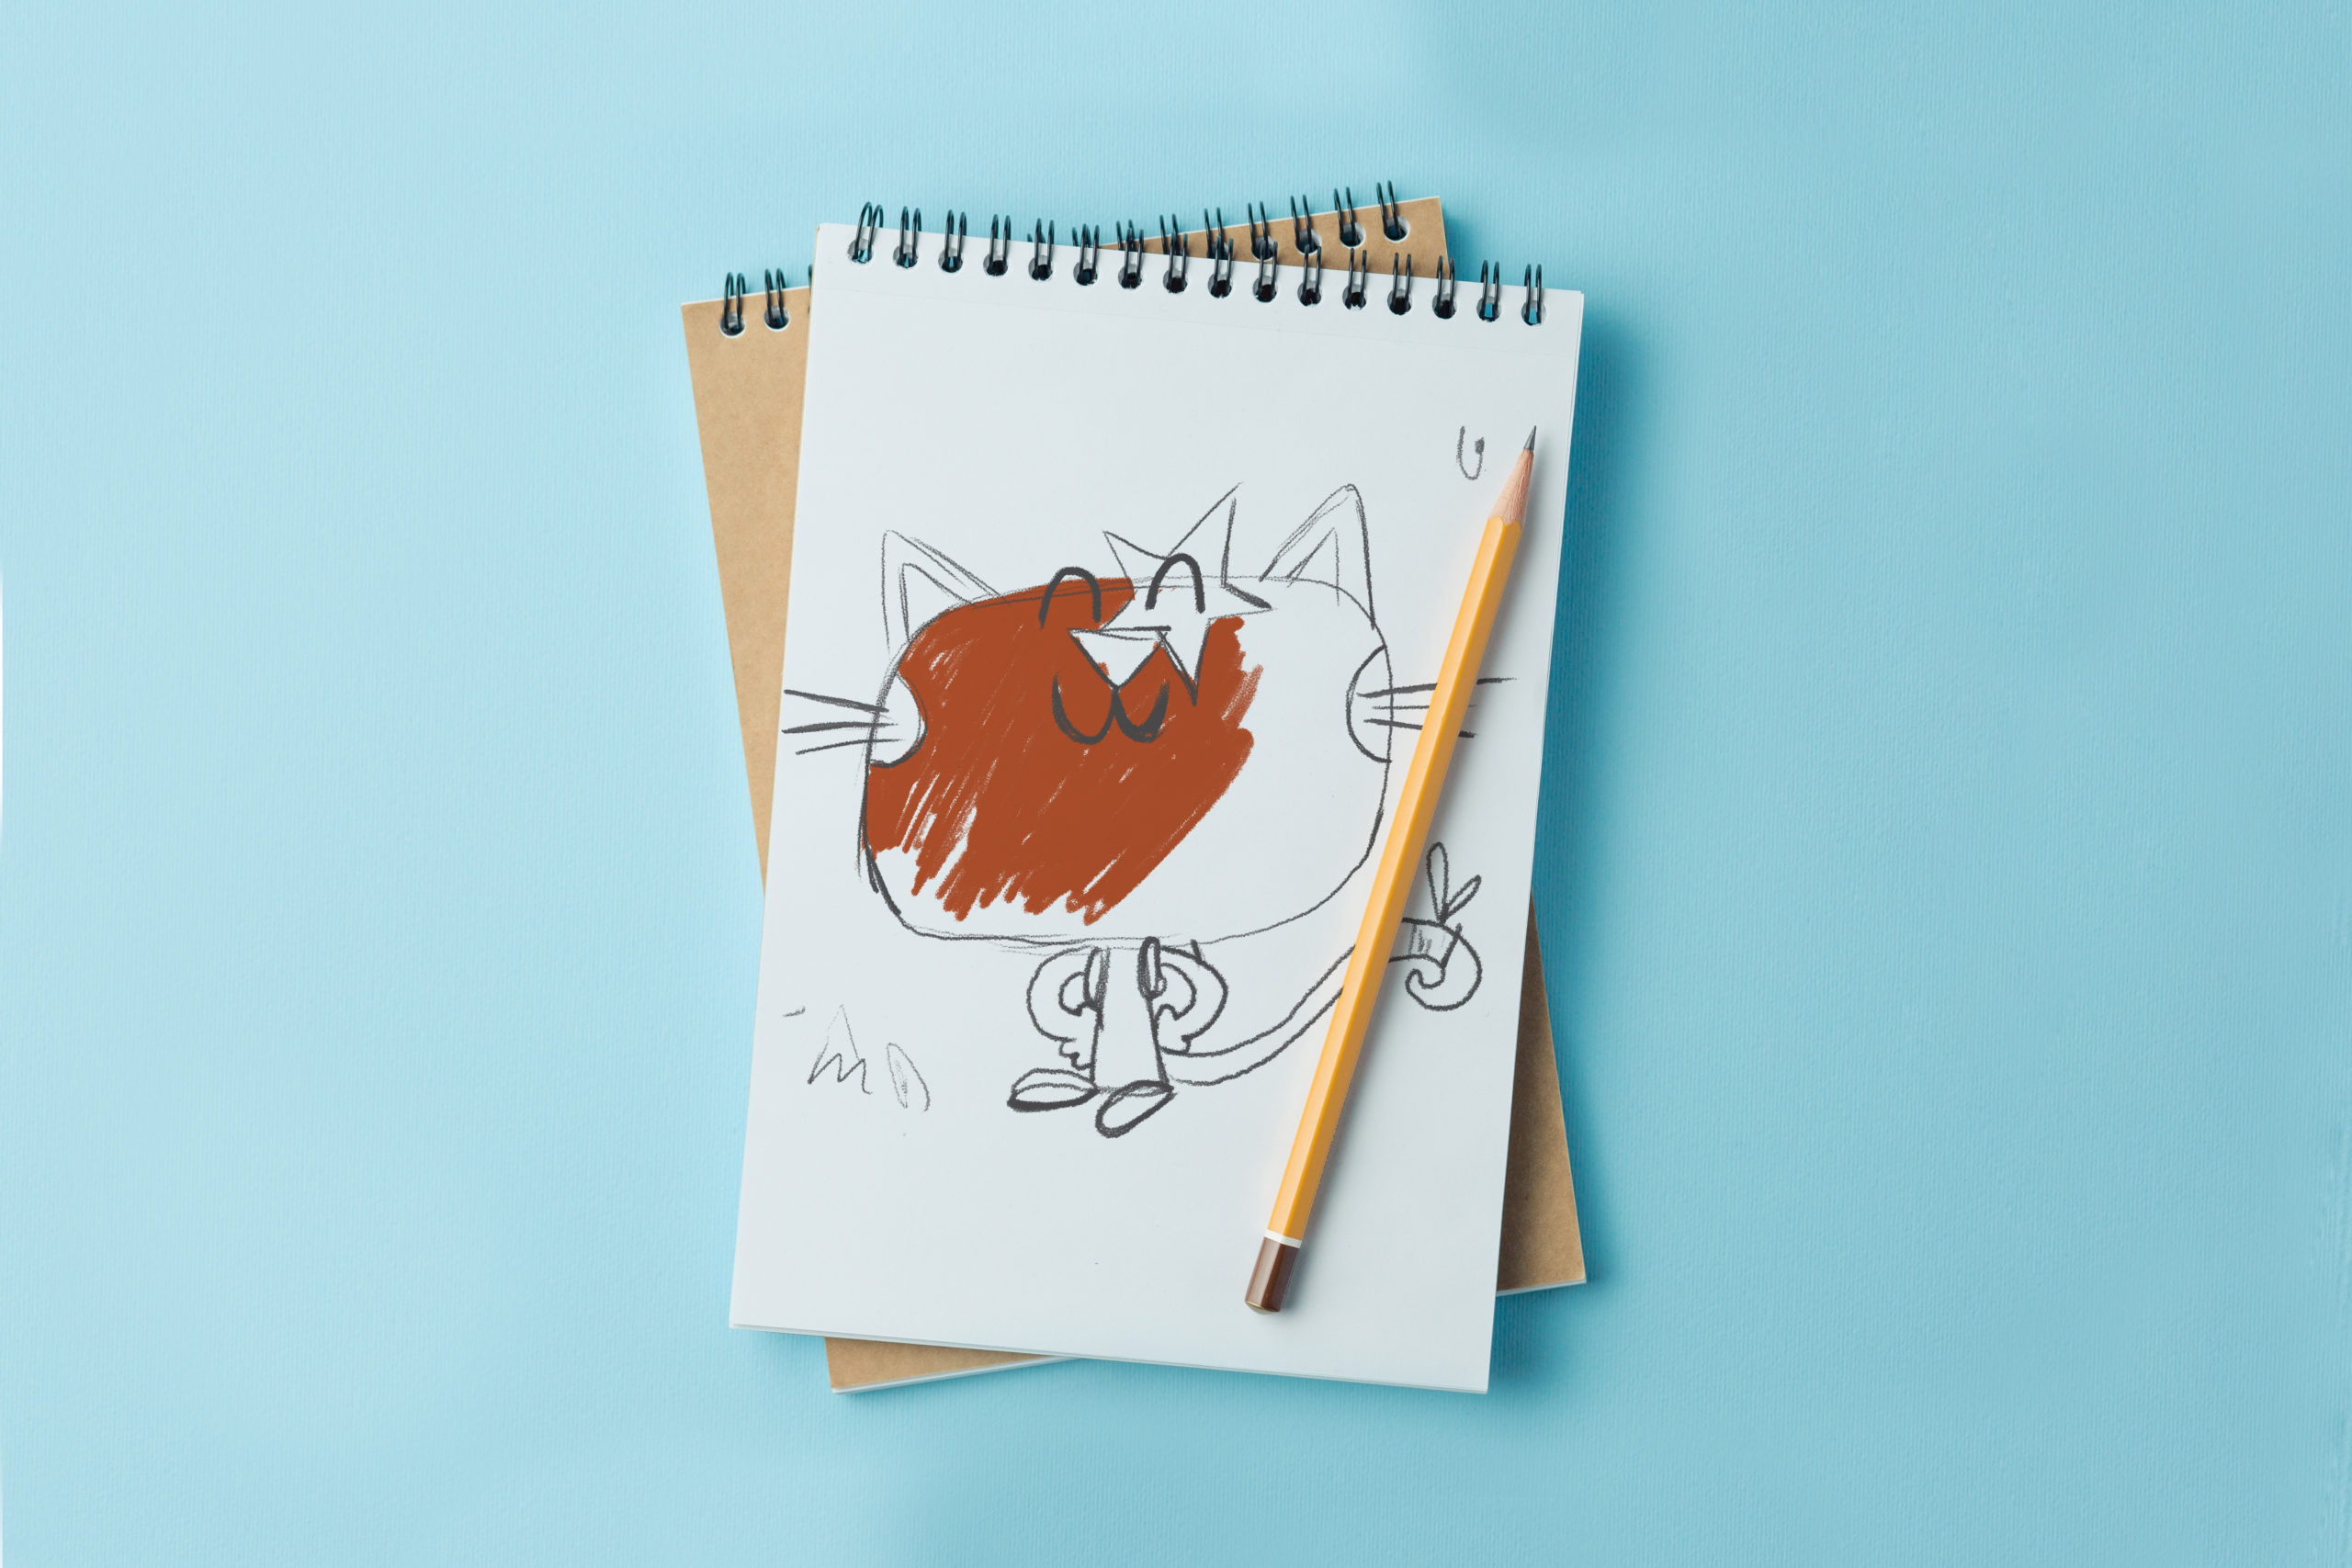
Let’s start with Banjo’s head! You know when you are trying to draw a perfect circle and it doesn’t turn out quite right? It’s a little more like a circular rectangle? This is exactly the sort of shape you want Banjo’s head to be!
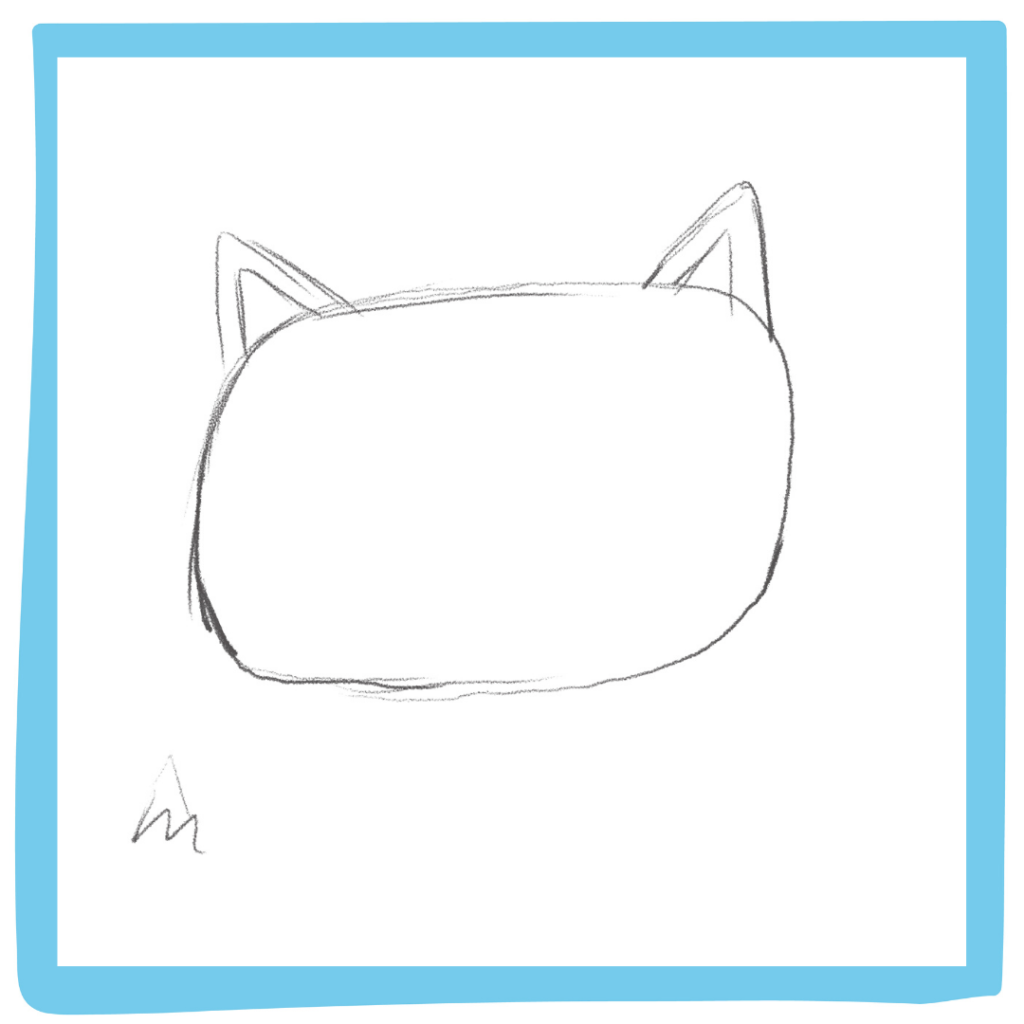
Step 2
Next up let’s draw Banjo’s ears. They’re shaped just like medium sized triangles with little triangles on the inside. You should add these on each side of his head!
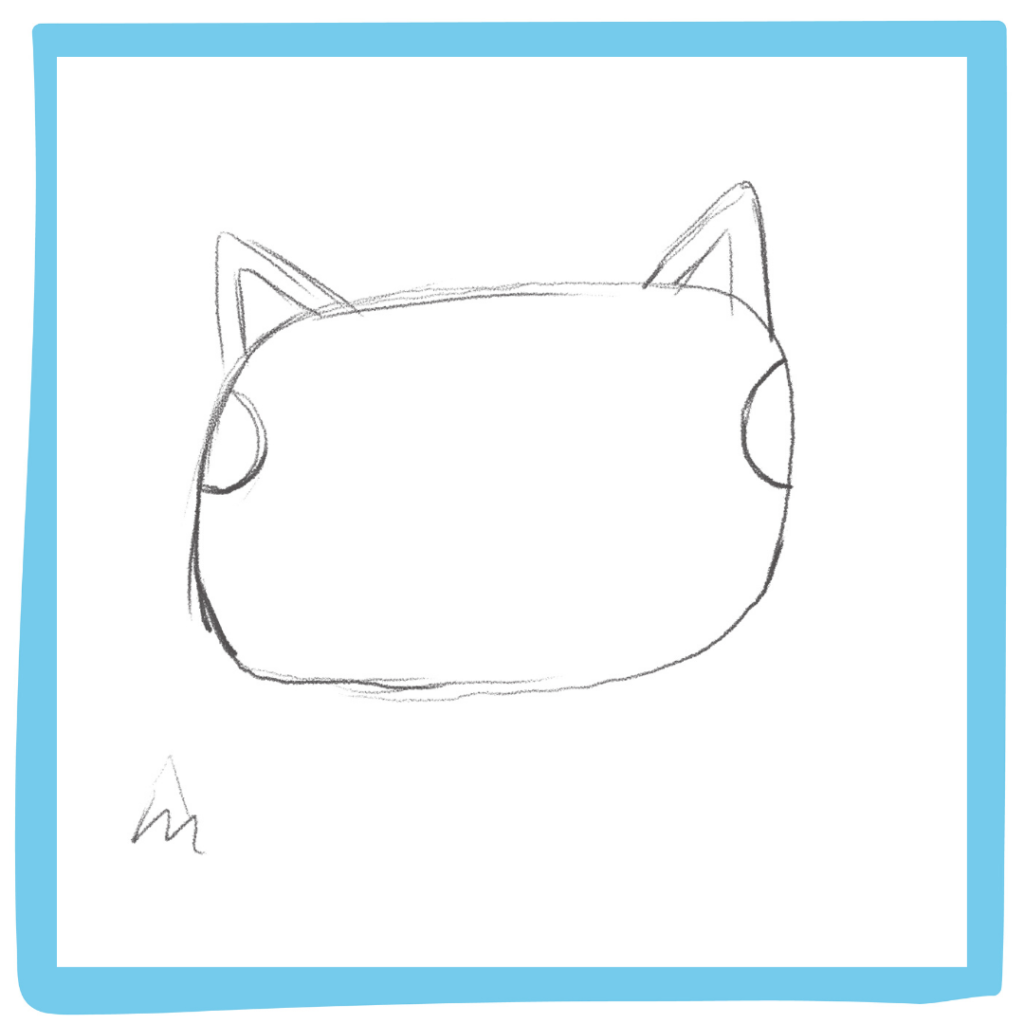
Step 3
Banjo’s cheeks are always peachy because he’s just so happy to be a magical, globe-trotting CAT! To draw the apples of his cheeks, add half circles on either side of his face, just a little below his ears!
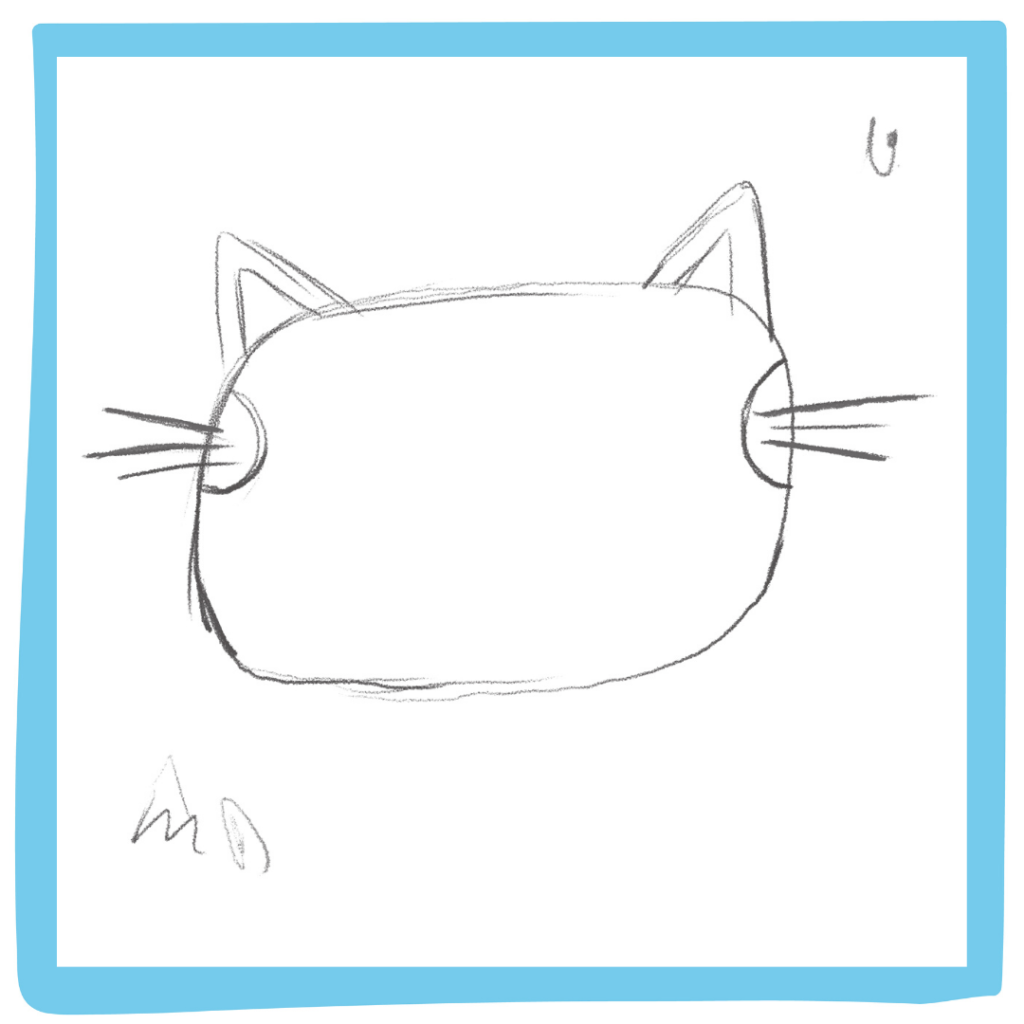
Step 4
As you know, Banjo’s a CAT! This means his whiskers are a VERY important feature! He has six whiskers in total, three on each side of his face, parallel to his cheeks.
Step 5
Now it’s time to add Banjo’s nose – a vital component! He’d be completely lost without it. How else would he sniff out all of the wonderful cuisine on his travels? For this step, simply draw an upside down triangle at the top of his face.

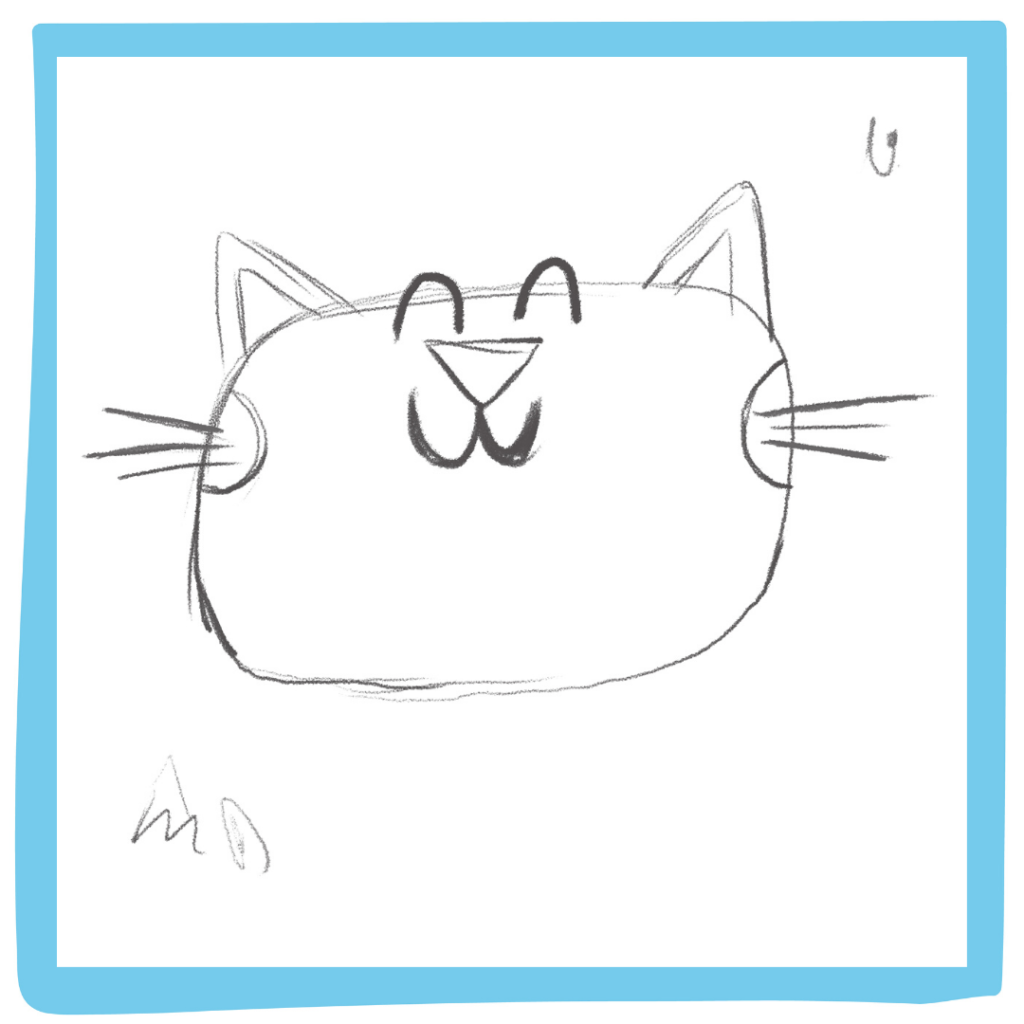
Step 6
Banjo’s eyes are like two upside down smiles, but not always! If you want to draw his eyes another way, why not refresh your memory with how they look in some of your old letters?
Step 7
To draw Banjo’s mouth simply add a big ‘W’ beneath his nose. Suddenly he’s beginning to look like the cat that got the cream!
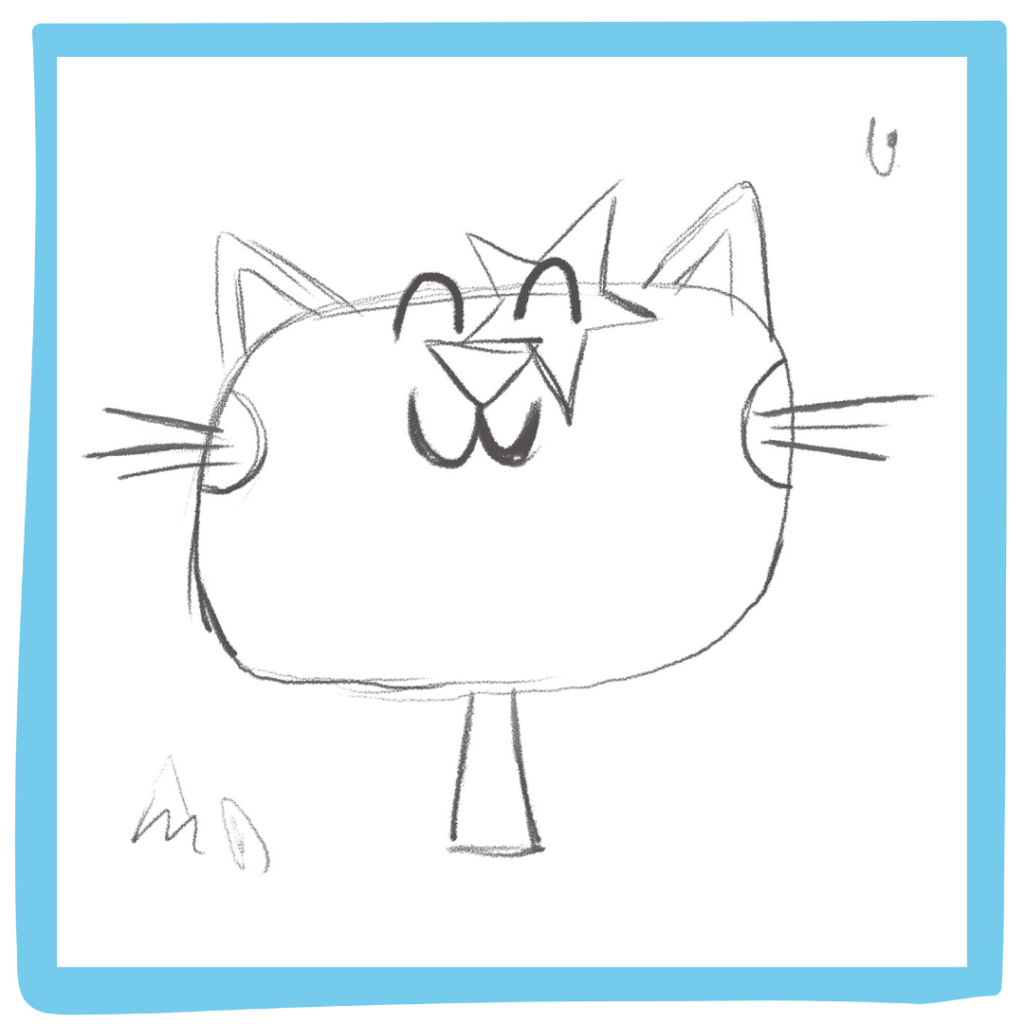
Step 8
To finish Banjo’s face we need to add his signature feature: the STAR! You should add this over his eye, on the right hand side of your drawing. Now he’s looking like a proper rock star, huh?

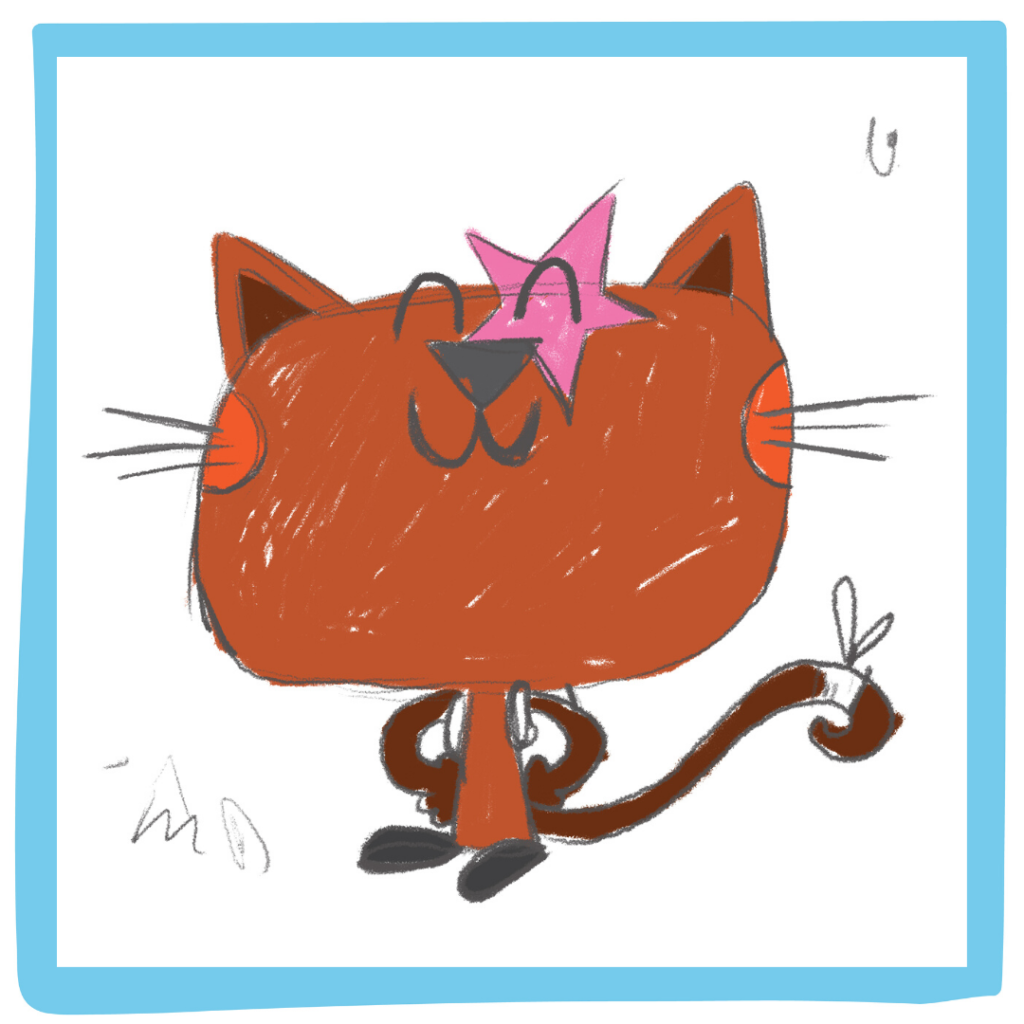
BRAVO, Banjo’s face is complete! You can stop and have a short lemonade break or you can move straight on to drawing his body!
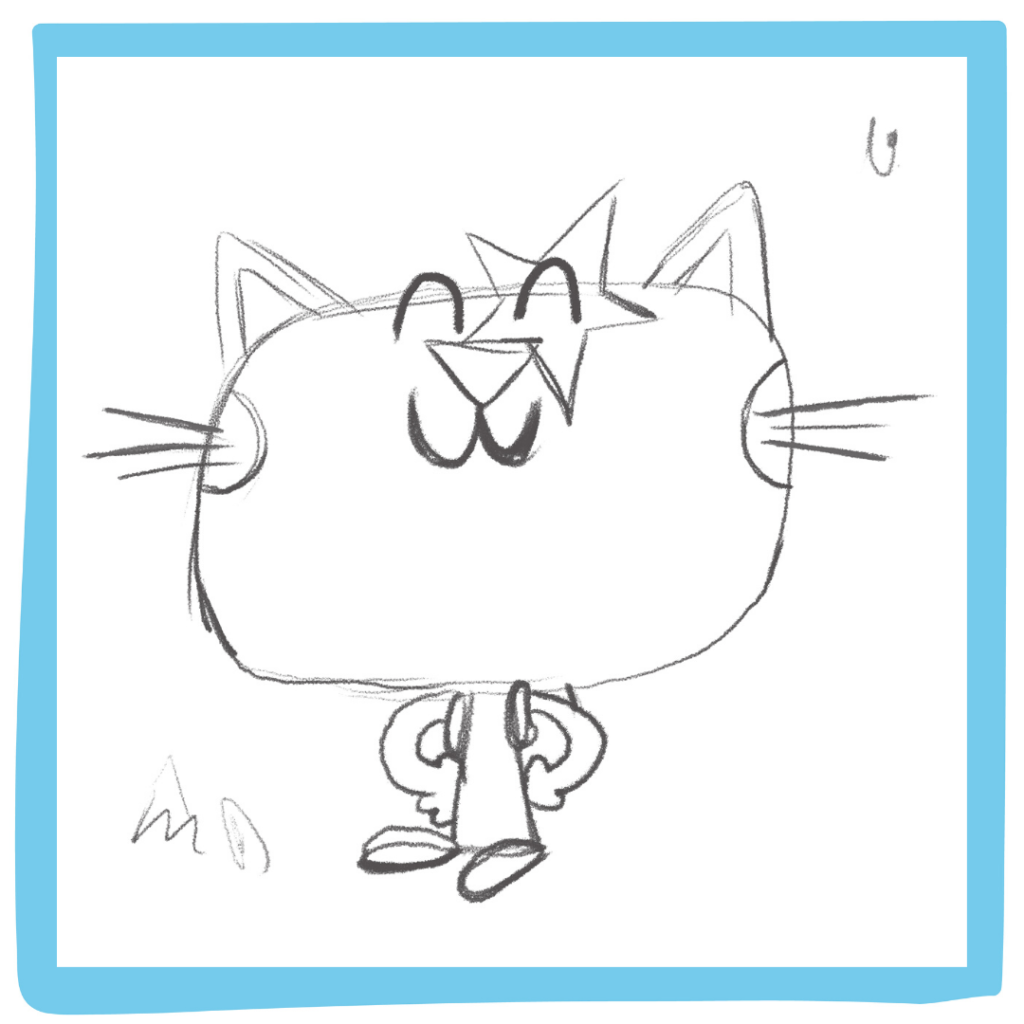
Step 9
Next up: Banjo’s body. This part’s a little like drawing a triangle with a flat top (instead of a pointy one).
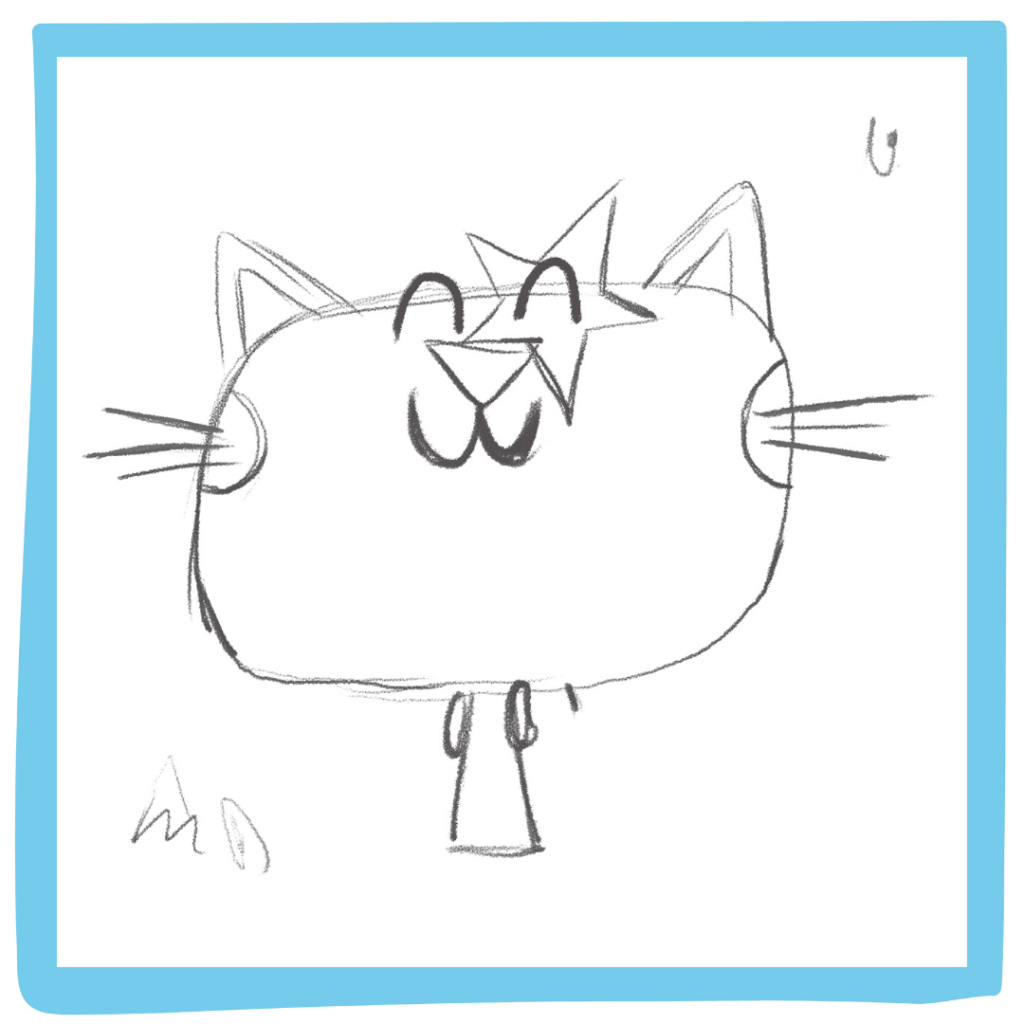
Step 10
Once completed, it’s time to add the handles of Banjo’s favourite blue backpack to your picture! Add one handle on each side of his body, just below his head.
Step 11
After this, you should add Banjo’s shoes. Careful not to forget them as they are REALLY important for a CAT who is travelling around the world!
Step 12
Now you need to add his arms coming out of his body, with his paws resting on his hips!
Step 13
Almost there, but Banjo would be heartbroken if you forgot his tail! This is like a long curly ‘S’ that begins at the bottom right hand side of his body.
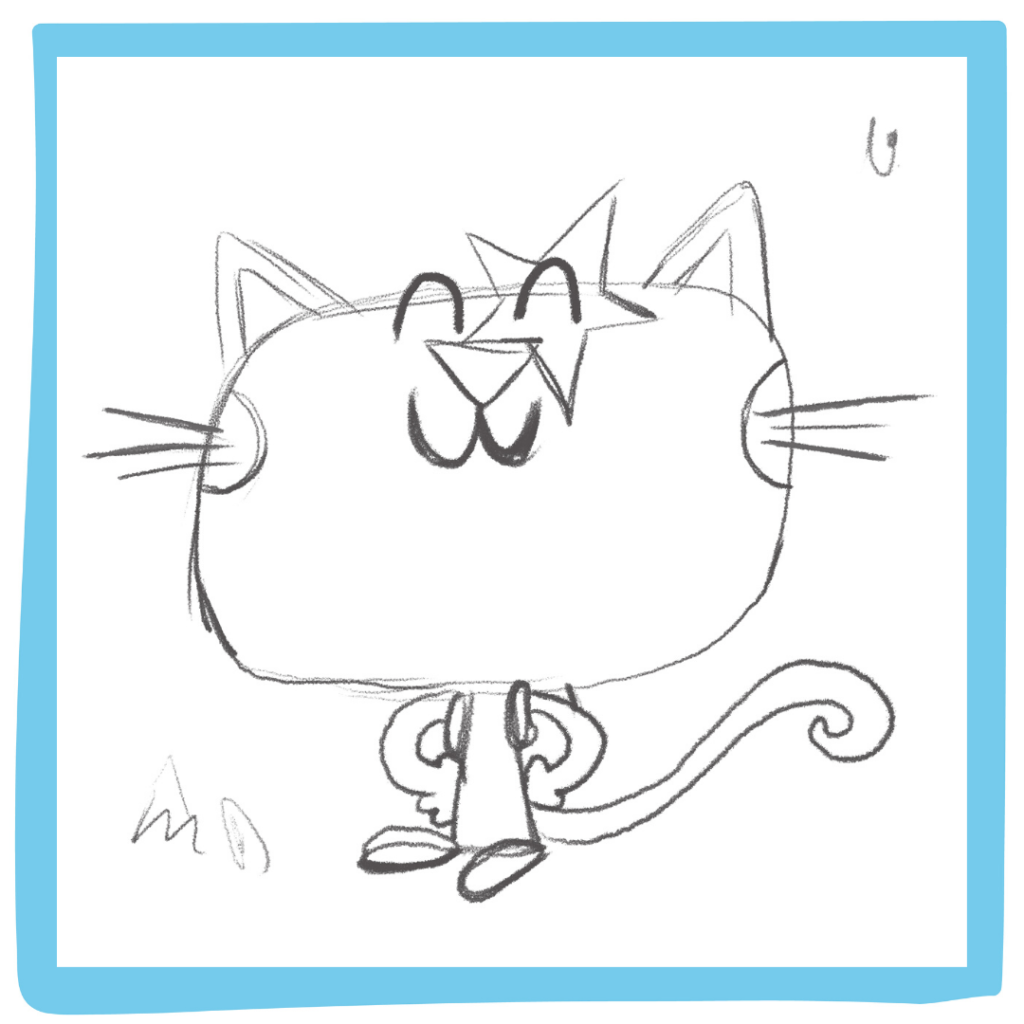
Step 14
Last but not least. We can’t forget Banjo’s bandage on his tail. This is another one of his signature features, his badge of honour in fact! Banjo believes this makes him look like a proper adventure puss, who has a lot of crazy stories to tell!

Congratulations, you’ve successfully drawn your very own picture of Banjo Robinson! Now you need to grab your colouring in pencils, crayons, markers and/or paints – it’s time to bring Banjo to life!
Step 15
Grab a dark orange or a light brown and fill in the tips of Banjo’s ears, his face and the main part of his body!
Grab any colour you like and fill in Banjo’s shoes- perhaps he’s just bought a new bright pink pair of trainers!
Then grab a dark brown and fill in the inner parts of his ears, his arms and his tail.
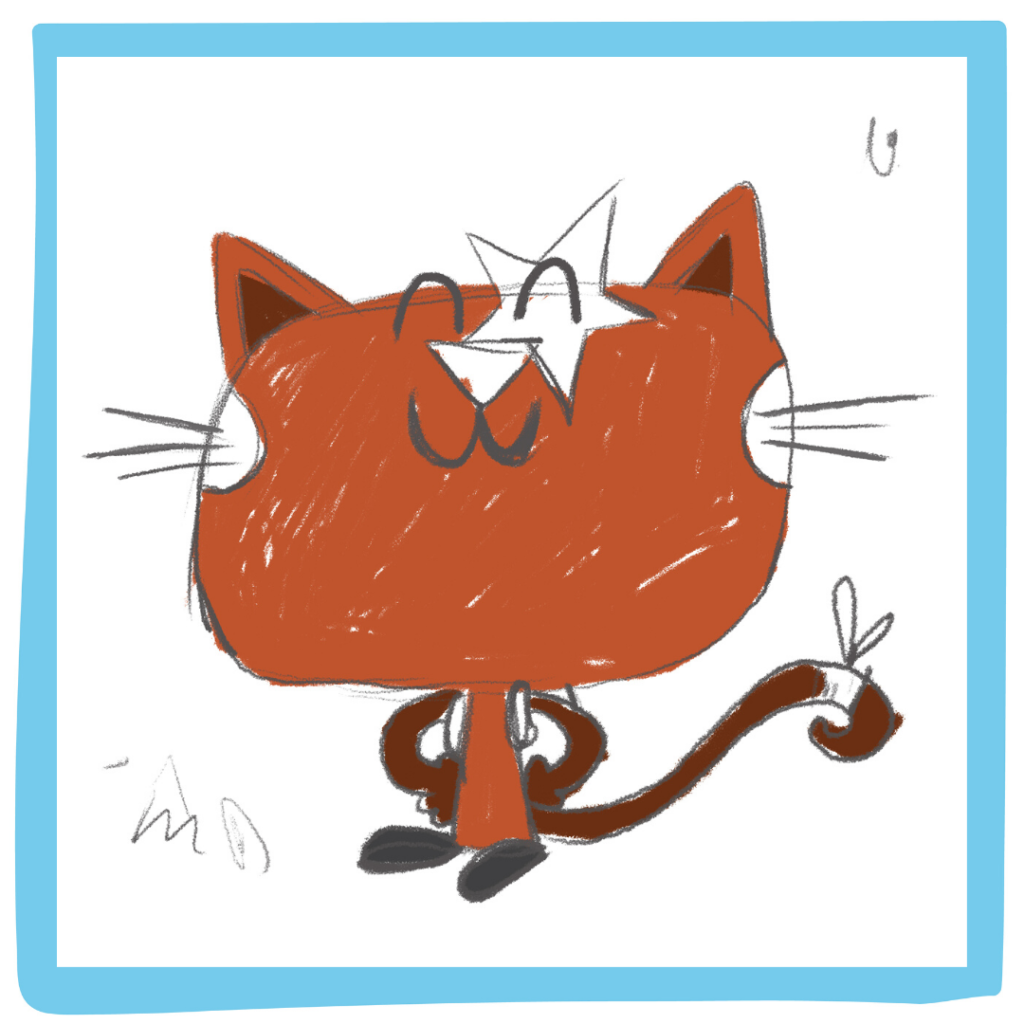
Step 16
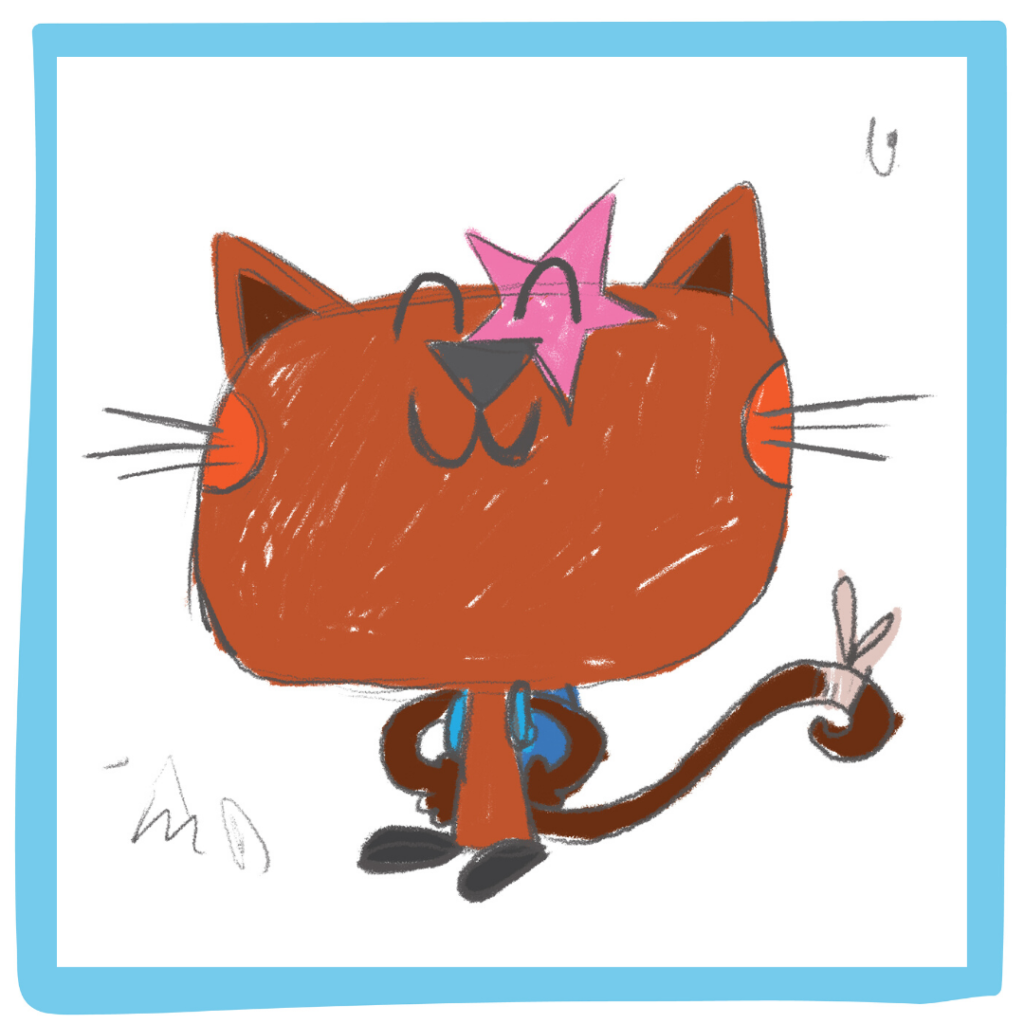
Finally time for the finishing touches!
The last time I saw Banjo, he was carrying a blue backpack, his star was pink and his cheeks were flushed peach.
You can colour these details in whatever way you want. In fact the wackier the colours you choose, the more wonderful your finished product will be!
Tah Dah!
I hope you loved my step-by-step illustration guide!
Why not get your parents to send me some pictures of your finished Banjo masterpieces? I’d love to see them!
You can email them to heythere@banjorobinson.com – I promise to show them to Banjo, next time we’re catching up!
Did you enjoy this?
Find out more about Banjo Robinson on our website here.
Sign up to receive fun activities every Thursday here.
Check out our other blogs here.